Classify by Value 2: Locations
Assign locations to groups, based on name
You can use Classify by Value (on the Data Menu) to assign locations to groups, based on the location name or other category variable. To get started, you follow the same steps that lead to Strata Manager for continuous variables.
Three first steps in Classify by Value
- Select the map Layer
- Specify the objects on that layer to classify
- Specify the grouping variable used to create the grouping
Here is an example where three types of store are all in the same layer. You wish each type of store to have a different-colored location icon in the map.
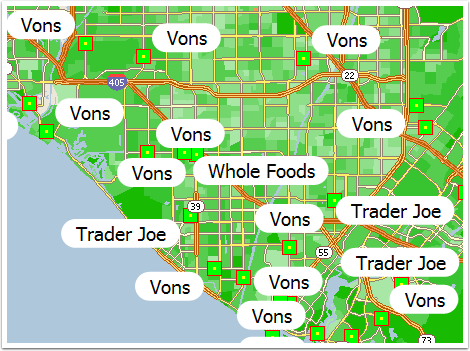
A starting map showing store locations in 3 chains, all on one layer
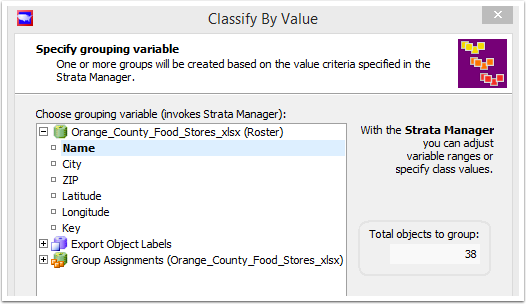
The layer here, Orange County Food Stores, is shown selected on the first page of the Classify by Value dialog below. "All objects in map" is selected to specify the objects on that layer, below:

Specify the objects on the layer
Thus, the first two steps, "select map layer," and "specify objects", are already completed.
Click the "next" button for the next step, 'specify grouping variable'. The dialog page shown below will appear:
Select the name (this is the store name) as grouping variable. Strata Manager will appear to the right.
Select the store name as classification value
Strata manager is shown below. Note the icon appearing with three tiny arrows to the right of the sentence "Assign each unique value to own group". This icon is actually an action button, and its name is "Assign each value to own group".
Based on the values of the store names appearing in the list below, you can probably guess what will happen when you press this button!
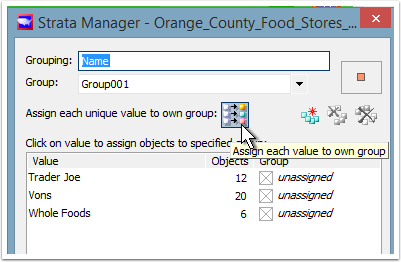
The stores are assigned to groups based on the name
Pressing the button creates three groups and assigns the locations. If you do not wish to assign ALL locations to their own groups, but just some store categories, you could instead press the boxes in the listbox and do the groups one at a time.
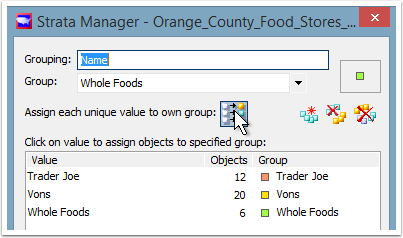
Press the button: "Assign each value to own group"
With the store chain groups assigned, you may wish to change the name of the grouping to something more specific than "Name". In this case, something like "Grocery chain" would be more appropriate.
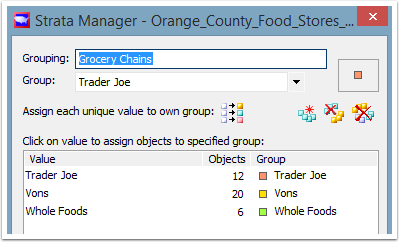
Rename the grouping from "Name" to "Grocery chain" to make sense in the legend
Now that you are done with your Strata Manager work, you can go back to the "Classify by Value" dialog and click the "Assign" button. Your map will show store chains by category, as below:
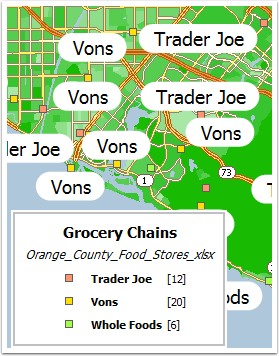
Map showing grocery chain location by group color
The grocery chains have been assigned to three groups, and their dots are colored in the default group colors of the first three groups: salmon, yellow, and green. You can change the group color and shape by selecting Group Manager from the Groups menu. A popular practice is to replace the square symbol for the store chain with the logo of the chain, making it possible to dispense with the text labels entirely
This concludes our coverage of Strata Manager for locations, based on "category" rather than continuously varying values.